Saturday, December 19, 2009

Simple and delicious Baklava or a Baklava torte


I got my inspiration for this recipe from Giada Delaurentis of food Network, but I've tweaked it a bit to make it a little healthier and more user friendly.
I made this twice.  The first time I made it using the recipe below.  The second time I made it, I made the torte, and it was wonderful!
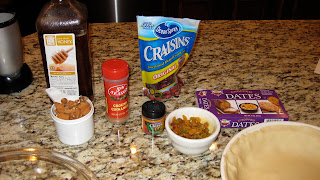

Ingredients
  • 1/2 cup almonds 
  • 1/2 cup walnuts
  • (use a total of 1 cup of any combination of nuts you like or have, I'd stay away from peanuts. The flavor is pretty strong, and will overpower the other ingredients)
  • 1/4 cup chopped dried apricots, figs, golden or regular raisons, dates, dried cherries or any other dried fruit you chose
  • 1/4 cup plain bread crumbs or oatmeal floured (put oatmeal in food processor and blend till floured)
  • 2 tablespoons sugar
  • 1 1/2 teaspoons ground cinnamon
  • 1/4 teaspoon ground cloves
  • Pinch of salt
  • 2 tablespoons canola oil
  • 3 tablespoons honey
  • 1 package rolled pie crust (like pillsbury)

Directions

Preheat the oven to 350 degrees F.
Place the almonds, walnuts, apricots, bread crumbs, sugar, cinnamon, ground cloves, and salt in a food processor. Run the machine until the mixture is very finely chopped. Transfer the mixture to a small bowl. Add 2 tablespoons of the melted butter and the honey and stir to combine.
Unroll the pie crust and cut with pizza cutter into about 12 equal sized pieces.  Gently press each cut piece of dough onto a cookie sheet. Place 1 tablespoon of the nut mixture into each of the dough pieces. Pinch the ends of each of the dough squares and twist to make a sachet shape. Continue shaping the remaining dough and mixtures onto the second cookie sheet.  Bake until the edges of the dough are golden, about 20 minutes. When cool enough to handle, remove the baklava  and transfer to a serving plate.

I made this as a thanksgiving treat the first time, now I'm making it again in the form of a torte, or pie for you southern folks, and I added some chocolate for good measure!


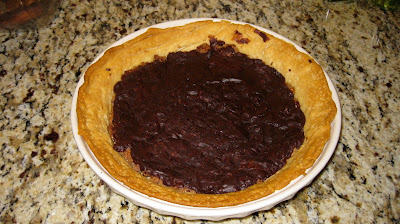
For the torte make filling as above then line the bottom of a pie plate with the crust.    After that add the filling and drizzle the chocolate over the top.  Bake at 375 degrees for 20-25 minutes.  
I made two.  One for us, and one for a Christmas Party.  I thought it might be nice to cut the one for the party into squares.


some of the needed ingredients


the nuts, oatmeal, and spices mixed


The melted balsamic chocolate
I used the same recipe for my balsamic chocolate truffles.
 See my recipe for balsamic chocolate truffles here


the finished torte


the finished torte cut into squares for my party

Thursday, December 17, 2009

Cute ideas from Nestle


I thought you might enjoy some of these ideas and recipes.


What you need
  • 2 large eggs
  • 1 can (12 fluid ounces) of NESTLÉ® CARNATION® Evaporated Milk
  • 2 tablespoons of granulated sugar
  • 2 teaspoons of rum extract*
  • 1/2 teaspoon of ground cinnamon
  • 1/4 teaspoon of ground nutmeg
  • 8 slices (1/2-inch-thick) firm, day-old bread, divided
  • Nonstick cooking spray
  • Powdered sugar
  • Maple syrup (optional)


How to do it
BEAT eggs,evaporated milk, sugar, rum extract, cinnamon and nutmeg in shallow dish until well blended. Place 4 slices bread into egg mixture turning over to evenly moisten both sides.


MEANWHILE, spray large skillet with nonstick cooking spray; heat over medium heat. Transfer prepared bread to skillet in single layer. Cook for 3 minutes on each side or until golden brown. Remove slices to serving platter. Repeat with remaining bread slices, spraying skillet with cooking spray if necessary. Sprinkle with powdered sugar. Serve immediately with syrup.


TIP:

• 3 tablespoons rum can be substituted for rum extract. Remove 3 tablespoons liquid before adding. 


Holiday traditions bind families together — they rekindle memories of good times past, promote a feeling of connectedness and give us all something to look forward to year after year. We encouraged a few of the families at NestlĂ© to share their most special holiday traditions. Perhaps they will inspire you to establish a few new traditions of your own.
Holiday Traditions — From Our Family to Yours
Movie Magic. Kick off the season with an annual "Holiday Movie Night." Line up your favorite holiday DVDs, warm up apple cider, microwave some popcorn and settle in on the couch together for hours.
Holiday Decorating. Have an annual ornament party. Invite friends over — kids and grownups alike — and start with a bare tree. Set out the construction paper, pipe cleaners, sequins, glitter and glue gun, and by the end of the night, the tree will be full of fantastic ornaments.
Gifts from the Heart. Set a rule that at least one family gift is handmade. Jewelry, cards, crafts — nothing shows how much you care like a homemade gift.
Wrap Around the World. If you travel a lot and purchase gifts during your trip, wrap them in that locale's newspaper.
Family Food. Celebrate your heritage. Have "Pierogi Day" or "Ravioli Day" around the holidays. Invite the whole family to form an assembly line, and spend hours talking, laughing and making your culture's food from scratch.
A Sweet Gesture. Pour a mug of hot OVALTINE® and make cookies and bring them to the town's senior center. Spend time listening to older folks share their favorite holiday memories. Here's a great holiday cookie recipe.
Bonus Craft Idea:
This ''Easy Stitch'' Christmas Stocking, a wonderful keepsake, may become your family's next holiday tradition!


Stuck on a unique gift idea for teacher this holiday season? We headed straight to the classroom and asked some veteran educators for some suggestions.


  1. Consider a group gift
    Ask parents in the class to donate to the "Teacher Fund" and buy a gift certificate to a movie theater, favorite restaurant or local spa facility.
  2. Get the kids involved
    Encourage the class to make a video with the help of a few parents. Each child can share what he or she loves about coming to school.
  3. Give the gift of time
    What teacher doesn't need help from time to time? Ask parents in the class to contribute their time. For example, you can volunteer to work with a small group of kids that need extra help in a math or reading. You can offer to give a guest lecture on something you're passionate about. You can staple homework packets, clean up after art class, chaperone a field trip — the teacher will appreciate it all! Present these helpful deeds to the teacher in a coupon book.
  4. Something for the entire staff
    If your child has a number of teachers throughout the day, think about a group gift for the school. Perhaps parents can chip in for a new microwave or coffee maker for the teacher's lounge. Or maybe you treat them all to a nice holiday lunch delivered to the school. Let them know in advance, of course.
  5. Decorations that can be used year after year
    Encourage all the students in the class to make an ornament with their name and the date on it. The teacher can use it to decorate the classroom or her home.
  6. Homemade is well loved, too
    This Friendship Mobile made with JUICY JUICE® boxes and students' photographs will be a big hit! It's easy to make, and teacher can use it in her classroom all year round.
  7. Make it personal
    Even the simplest gift can be enhanced with a handwritten note thanking the teacher for all he or she has done. Be specific. Notes that say such things as "Thanks to you, my son is excited about math for the first time ever," or, "You've really made history come alive for my daughter," are sure to be treasured for years to come


Monday, December 14, 2009

Different Styles of Christmas Tree

I've been having so much fun looking at some of your Christmas trees.  Check out these unique trees I found on HGTV's website.


A country Christmas Tree


pretty white bows and decorations


This ones kinda funky


Simple lights and decorations


Last but not least my little tree.

Saturday, December 12, 2009

Homemade Breakfast Burritos

I recently got inspired to cook some breakfast burritos in mass.

I went to Sam's Club on my way home from church to get supplies, but they had no wheat or multigrain tortillas.  SOOO not wanting to use the bleached white kind I decided to make my own using multigrain flour.   No I'm not Mexican, or from a family that did this regularly or EVER,  just impatient.  You see when I get an idea I want to try it ASAP!  This mindset has actually been the cause of many of my creations reations over the years


I made a variety, because in my house everyone likes something different

I used eggs, turkey sausage, and cheese on some

Cheese and eggs on others

and spinach, egg and feta on the others
Of course you could use whatever you family likes

After I prepped them all, I rolled them really tightly, and put them in baggies.  Just a tip: when I bag something to freeze, I zip it most of the way then stick a straw in the baggie.  I suck out the remaining air and zip the rest of the way.  This is my way of vacuum sealing.

I got this recipe for flour tortillas online.  I did not use lard (just the sound of that word disgust me) Yuck! I used canola oil


HOMEMADE FLOUR TORTILLAS


2 cups all-purpose flour
1-1/2 teaspoons baking powder
1 teaspoon salt
2 teaspoons vegetable oil or non-hydrogenated lard
3/4 cup lukewarm milk

In a bowl, stir together the flour, baking powder, and salt. Add vegetable oil to the lukewarm milk and whisk briefly to incorporate. Gradually add the milk to the flour mixture, and using clean hands, work into a sticky dough.Turn dough out onto a surface dusted with flour and knead vigorously for about 2 minutes or until the dough is no longer sticky.
Return dough to bowl, cover with a damp cloth and allow to rest for 10 -20 minutes so that it will be easier to roll out.
Divide dough into 8 balls of equal size, cover them, and let them rest again for about 20 minutes. Avoid letting them touch, if you don't want them to stick together.
Dust a clean pastry board or working surface with flour.
One at a time, remove each piece of dough. Press it out into a 5-inch circle. Using a flour dusted rolling pin, roll out the tortilla from the center out until the tortilla measures a little less than 1/4 inch thick and is a 7 or 8 inch circle.
Transfer the tortilla to a dry preheated skillet or griddle. when the tortilla begins to blister, allow it to cook for 30 seconds, flip it, and cook the other side the same way.
Remove tortilla, place it in on a clean paper towel and cover loosely with foil. Repeat for remaining tortillas.
Tortillas freeze well. Wrap tightly in plastic, removing any air pockets. Keeps frozen for several weeks.
To serve tortillas which have been frozen, thaw at room temperature, wrap in foil and heat in a warm oven.

These homemade breakfast burritos are an economical way to feed your family a nutritious breakfast on a busy morning.  Just pull one out the baggie and microwave a minute or so, or wrap in foil, and bake in the oven at 400 degrees for about 20 min.  They really are better in the oven, but that kinda defeats the purpose of convenience food doesn't it?  ENJOY


My friend Shelly over at Shelly's Swag featured me and this recipe today.  You should definitely check out her blog; she features multiple coupons and money saving deals and tips each day.  


Thursday, December 10, 2009

My NOT so Sad Christmas Tree

First I need to thank all of you who gave such good and needed advice with regards to my sad little Christmas tree.
It's strange...I have a good eye when it comes to decorating.  I know proportion and scale.  I can pair things together beautifully, mixing old and new items.  I even work really well with colors and textures, but when it came to my Christmas tree year after year I couldn't get it right.  I was never happy with the look.


these are the before, they just lacked any style or theme


and after

it doesn't show well in the pictures, but it looks sooo much better!


I learned a few things about decorating a Christmas tree.

1.  Use about 3 main, coordinating colors
2.  Use 3 different bulb sizes
3.  White lights are a must!  I know, I know, this is highly controversial, LOL.
4.  Last but not least, have it reflect your personal style.  I like things simple, pared down.  That's why I wasn't happy with my previously decorated tree.  It had way too many colors on it, way too many different styles and colors of ornaments, and too much garland.  I seriously felt annoyed every time I walked by it.
If you feel that way about your tree, your holiday decor, or anything else in your home,  change it!  


Wednesday, December 9, 2009

It's Like New Front Door

My home isn't very old, but the front door need to be restained.  When it was originally stained some water or a cleaning chemical dripped on it, and caused these drip marks.

They aren't easy to see, but there are several below the window.  Since it is the builders responsibility to make everything right, I was going to take full advantage, and have him redo it.
Well, when the painters came, they tried to strip the door.  After several hours of work they said it would never look right restained, and that they needed to paint it instead.  Reluctantly I suggested they paint it black.

What do you think of the results?


While you're here come on in and take a peek at some of my Christmas decorations


Dining room chandelier


little breakfast table I moved and set up in the dining room, so we'd have more room to sit around the tree


Help! no matter what i do I never like the way my Christmas tree turns out.  :-(
What am I doing wrong; I'd love some feedback here!


This area is more kid friendly (a little tacky maybe), but still kid friendly and full of handmade memories


honestly, I HAD to put out these cute little decorations that my boys made


breakfast table


the stockings hung by the chimney with care

just a few simple decorations in the living room
Hope your having fun decorating your house!

P.S. Feedback please on that sad little tree?


Easy Holiday Centerpieces

These all look pretty simple to make.  I  found them at Readers Digest and Better homes and Gardens online.


Another idea I had is to take any wreath you have lying around, lay it flat on the center of your table and put a vase, jar, or hurricane in the middle, and fill with anything you think looks festive.
Ex. glass bulbs, flowers, a chunky candle, water or colored water with a tea light floating, water with floating flowers

Use your imagination the possibilities are endless!

Sunday, December 6, 2009

Balsamic Chocolate Truffles


Oh, the name says it all.  Here is the recipe from Giada De Laurentis of Food Network

Ingredients

  • 8 1/2 ounces dark chocolate, chopped (recommended: Valrhona)
  • 1/4 cup cream
  • 2 teaspoons balsamic vinegar
  • 1/2 cup cocoa powder

Directions

Melt the chocolate and cream in a double boiler over hot but not simmering water. Place melted chocolate in a small bowl. Stir in the balsamic vinegar. Cool the chocolate in the refrigerator for 1 hour. Remove from the refrigerator and let sit at room temperature for 2 hours, until firm but moldable.
Use a teaspoon to scoop out chocolate. Use your fingertips to shape into balls about the size of a cherry. Set the chocolate balls on a parchment-lined tray.
Place the cocoa powder in a small shallow dish. Place 6 truffles at a time in the cocoa powder and roll the truffles around to coat, and return the coated truffles to the baking sheet. Continue with the remaining truffles. Place the truffles in a serving dish or airtight package.
This is what I did differently:
I added almond milk to avoid the cream.  I also didn't think the balsamic flavor was strong enough so I reduced the milk and increased the balsamic vinegar.
These were so good we couldn't  wait for the chocolate to set up.   We dipped pretzels in the melted chocolate  YUM YUM YUM!!!


Friday, December 4, 2009

Recycled Gift Wrap!!!


I know a lot of you save gift bags, some maybe even save used wrapping paper, and others bows, but have you ever thought of saving all these?

I am vowing this year to not buy any gift wrapping paraphernalia.  This will be difficult because most of you know that have read my blog for any time at all, that I LOVE to shop.  It's just so tempting this time of year  to snatch up those pretty papers and ribbons, not to mention all the gorgeous boxes and bags.   BUT I'm committing  to not buy ANY and I mean ANY, Christmas wrapping stuff.


Here are some gifts I wrapped myself, and a store bag I reused.
You can stick a bow over top of a tag or label and it's as good as new!


I got some of the ideas from Deliciously Organized.  Isn't this beautiful?


this ones from Martha Stewart

A few tips to help you use what's on hand and make it fun and pretty:

Rip pages from holiday magazines or catalogs once you done reading them; you can use these to wrap small presents.

Save wrapping paper scraps to make coordinating or contrasting "ribbons" around your gifts.

Save newspaper pages, especially ones that are festive fun or funny.  Ex. the sports section may be great gift wrap for the men in your life.

Save tissue too.  Gifts can look really great wrapped in this.  I even like the look of wrinkled tissue.  It has sort of a shabby chic look.

Ask for paper bags at the grocery store.  Punch some hole in the top and feed ribbon through for handles.  You can decorate or leave plain for a simple rustic look.

Thursday, December 3, 2009

Holiday Apps!


Ingredients

  • 4 thick strips bacon, thinly sliced
  • 1 large white onion, thinly sliced
  • Pinch of sugar
  • Kosher salt and freshly ground white pepper
  • 6 scallions, thinly sliced
  • 1 teaspoon capers
  • 1/2 cup fresh parsley
  • Grated zest of 1/2 lemon
  • 1/4 cup extra-virgin olive oil
  • 1/3 cup creme fraiche or sour cream
  • 1 pound frozen pizza dough, thawed
  • All-purpose flour, for dusting

Directions

Preheat the oven to 450 degrees. Cook the bacon in a large skillet over medium heat, stirring from time to time, until browned and crispy. Transfer to paper towels to drain; keep warm. Add the onion slices to the drippings in the skillet; sprinkle with the sugar and season with salt and pepper. Cook until light brown and tender, 5 to 7 minutes. Taste for seasoning.
Combine the scallions, capers and parsley in a food processor. Add salt and pepper to taste and half of the lemon zest; pulse gently to chop and blend. Turn the processor on and add the olive oil through the top in a steady stream. Transfer the scallion pesto to a bowl; set aside.
In a small bowl, whisk the creme fraiche and the remaining lemon zest until smooth. Season with salt and pepper; set aside.
Roll the pizza dough into an 8-by-14-inch rectangle on a lightly floured surface. Roll the dough around the rolling pin and unroll it onto a baking sheet lined with parchment paper. Place in the center of the oven and bake for 10 to 12 minutes, or until golden brown.
Spread the creme fraeche mixture on the crust. Dot with the onions and some of the bacon drippings from the pan; sprinkle with the bacon. Slice into pieces and drizzle with scallion pesto.

Green Herb Hummus

Ingredients

  • 1 (15-ounce) can chickpeas, drained and rinsed
  • 1 clove garlic
  • 2 tablespoons tahini
  • 1/4 cup fresh parsley leaves
  • 6 fresh basil leaves
  • 1 medium scallion, chopped
  • 1 tablespoon chopped fresh dill
  • 1 teaspoon honey
  • 1 tablespoon fresh lemon juice
  • 1/8 teaspoon cayenne pepper
  • 1/4 teaspoon kosher salt
  • 1/3 cup extra-virgin olive oil
  • Options for dipping: carrot sticks, sliced cucumber and whole-wheat pita chips

Directions

Place ingredients in a food processor fitted with a steel blade and pulse until smooth.
Serve with dippers.

White Bean and Roasted Eggplant 
Hummus


Ingredients

  • 1 (1 1/2-pound) eggplant or 3 Japanese eggplants, trimmed and cut into 2-inch pieces
  • Olive oil, for drizzling, plus 1/3 cup
  • Kosher salt, for seasoning, plus 1/2 teaspoon
  • Freshly ground black pepper, for seasoning, plus 1/4 teaspoon
  • 1 (15-ounce) can cannellini beans, drained and rinsed
  • 1/3 cup loosely packed fresh flat-leaf parsley
  • 3 tablespoons fresh lemon juice (from about 1 lemon)
  • 1 clove garlic
  • 1 hothouse cucumber, cut into 1/4-inch thick slices

Directions

Preheat the oven to 450 degrees F and place an oven rack in the middle.
Place the eggplant on a parchment paper-lined baking sheet. Drizzle with olive oil and season with salt and pepper. Roast for 20 to 25 minutes until golden brown. Set aside to cool.
In the bowl of a food processor, combine the cooled eggplant, beans, parsley, lemon juice, garlic, 1/2 teaspoon salt, and 1/4 teaspoon pepper. Pulse until the mixture is coarsely chopped. With the machine running, gradually add 1/3 cup of olive oil until the mixture is creamy. Season with salt and pepper, to taste.
Place the hummus in a dipping bowl and serve with the cucumber slices. Alternatively, spoon the hummus over the cucumber slices and arrange on a serving platter.

Sugar and Nut Glazed Brie
Ingredients
  • 1/4 cup packed brown sugar
  • 1/4 cup chopped macadamia nuts or pecans
  • 1 tablespoon brandy
  • 1 (14-ounce) round brie
  • Apple wedges, for serving
  • Pear wedges, for serving
  • 2 to 3 tablespoons lemon juice
  • Crackers, for serving

Directions

In a small bowl stir together the sugar, nuts, and brandy. Cover and chill for at least 24 hours or up to 1 week.
Preheat oven to 500 degrees F.
Place the brie on an ovenproof platter or pie plate. Bake for 4 or 5 minutes or until the brie is slightly softened. Spread the sugar mixture in an even layer on top of the warm brie and bake for 2 to 3 minutes longer, or until the sugar melts. Brush the fruit wedges with lemon juice and arrange them around 1 side of the brie. Place crackers around the other side.


Spinach Gruyere Puff Pastry


Ingredients

  • 1 (10-ounce) package frozen chopped spinach, thawed
  • 4 tablespoons butter, divided
  • 1 cup sliced fresh mushrooms
  • 4 ounces Gruyere cheese, grated
  • 1 (17 1/2-ounce) package frozen puff pastry sheets, thawed

Directions

Preheat oven to 350 degrees F.
Drain spinach well, pressing between layers of paper towels to remove excess moisture.
Melt 2 tablespoons butter in a skillet over medium heat. Add mushrooms and cook, for 5 minutes. Stir together spinach, mushrooms and cheese; set aside. Roll 1 pastry sheet into a 13 by 11-inch rectangle. Melt remaining 2 tablespoons butter. Brush 1/2 melted butter over pastry. Spread 1/2 spinach mixture over butter. Roll-up, jellyroll fashion, starting with the long side. Repeat procedure with remaining pastry sheet, butter, and spinach mixture. (Wrap rolls in plastic wrap and refrigerate up to 2 days, if desired.) Cut rolls into 1/4-inch thick slices. Place on lightly greased baking sheets. Bake for 15 to 20 minutes, or until golden brown.
As always tweak these recipes to make them your own, or to use what you have on hand.